Recent Fire Damage Posts
Rising from the Ashes: Restoring and Repairing Fire-Damaged Walls and Ceilings
11/30/2023 (Permalink)
When a fire strikes, the damage left behind can be devastating. The walls and ceilings in a property often bear the brunt of the destruction, leaving them charred, stained, and structurally compromised. Restoring and repairing fire-damaged walls and ceilings requires expertise, careful assessment, and a systematic approach. In this blog, we will delve into the steps involved in restoring these vital elements of a property to their pre-fire condition.
Safety First
Before beginning any restoration work, ensure that the area is safe to enter. Check for structural stability, potential hazards, and make sure to wear appropriate protective gear, including gloves, goggles, and a respirator.
Assessment and Cleaning
Begin the restoration process by thoroughly assessing the extent of the damage. Remove any loose debris, soot, or charred materials from the walls and ceilings. Use a vacuum cleaner equipped with a HEPA filter to gently remove loose soot particles, taking care not to spread them further.
Smoke and Soot Removal
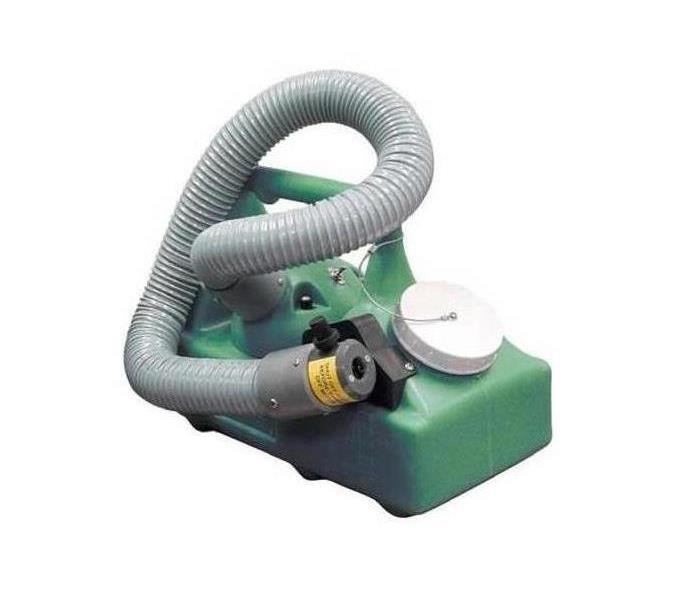
Smoke and soot can penetrate deeply into the porous surfaces of walls and ceilings. To effectively remove these contaminants, use specialized cleaning solutions or enlist the help of professional fire damage restoration services. The cleaning method may vary depending on the surface material, such as drywall, plaster, or wood paneling. Follow manufacturer instructions or the guidance of professionals to ensure thorough cleaning and removal of smoke and soot residue.
Surface Preparation
Once the smoke and soot have been removed, it is essential to prepare the surfaces for repair. This involves smoothing out uneven areas, filling in cracks or holes, and ensuring proper adhesion for the subsequent layers of paint or texture. Use suitable patching compounds, spackle, or joint compound to repair damaged areas. Sand the patched areas to achieve a smooth surface.
Priming and Painting
Applying a primer is crucial to seal the repaired surfaces and provide a uniform base for the paint. Choose a primer specifically designed for fire damage restoration, as it can help to block any remaining odors and prevent stains from bleeding through the paint. After the primer has dried, select a paint color and type suitable for your desired finish. Apply multiple coats of paint, ensuring complete coverage to restore the walls and ceilings to their original appearance.
Texture Matching
If your walls or ceilings had a textured finish before the fire, it is necessary to match the texture during the restoration process. Texture can be replicated using specialized tools, such as brushes, sponges, or specialized sprayers. Practice on a small area or seek guidance from professionals to achieve a seamless texture match.
Professional Assistance
Restoring fire-damaged walls and ceilings can be a complex task. If the damage is extensive or if you lack experience, it is advisable to consult with professional fire damage restoration services. These experts have the necessary knowledge, skills, and equipment to evaluate, restore, and repair fire-damaged walls and ceilings safely and effectively.
In conclusion, restoring and repairing fire-damaged walls and ceilings requires a systematic and careful approach. From thorough assessment and cleaning to proper surface preparation, priming, painting, and texture matching, each step is crucial to achieving a successful restoration. However, in the case of extensive damage or if you are unsure about the process, it is recommended to seek professional assistance to ensure the best possible outcome. With careful restoration, these walls and ceilings can rise from the ashes and be restored to their pre-fire condition.
DIY Soot Web Removal: Safety Precautions and Step-by-Step Guide
8/13/2023 (Permalink)
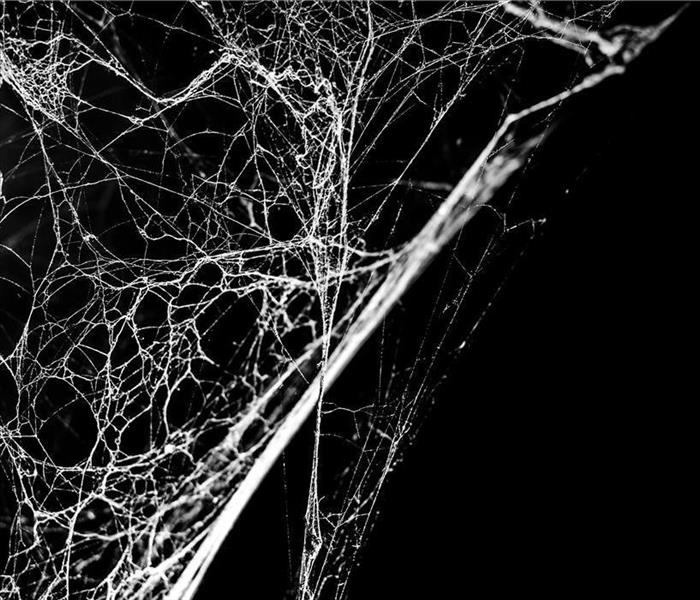 By following the step-by-step guide and implementing safety precautions, you can safely eliminate soot webs.
Soot webs can be a frustrating and unsightly issue for homeowners and property owners. These dark, sticky webs are formed when soot particles combine with moisture, creating a substance that attracts dust and other airborne particles. While professional cleaning services are available, some individuals may prefer a do-it-yourself (DIY) approach to removing soot webs. In this blog post, we will provide you with a step-by-step guide for DIY soot web removal, along with essential safety precautions to ensure a successful and safe cleaning process. By following these guidelines, you can effectively eliminate soot webs and restore the cleanliness of your home or property.
Safety Precautions
Wear Protective Gear
Before starting any cleaning process, it is crucial to prioritize your safety. Wear protective gear such as gloves, goggles, and a dust mask to shield yourself from potential respiratory irritants and allergens present in the soot webs.
Ensure Proper Ventilation
To avoid inhaling airborne particles and fumes, open windows and provide adequate ventilation in the area you are cleaning. This will help minimize the concentration of particles and improve air circulation.
Turn Off Heating/Cooling Systems
If the soot webs are present near heating or cooling vents, turn off the systems before cleaning. This prevents the spread of particles throughout your home or property and avoids potential damage to the HVAC system.
Step-by-Step Guide for Soot Web Removal
Step 1: Assess the Area
Thoroughly examine the affected area to identify the extent of the soot web accumulation. This will help determine the appropriate cleaning methods and tools needed.
Step 2: Prepare the Cleaning Solution
Mix a mild cleaning solution by combining warm water with a small amount of dish soap or a specialized soot cleaner. Avoid using harsh chemicals, as they may cause further damage to surfaces.
Step 3: Test on a Small Area
Before applying the cleaning solution to a larger surface, test it on a small, inconspicuous area to ensure it does not cause any discoloration or damage. Wait a few minutes and observe the test spot for adverse reactions.
Step 4: Vacuum Loose Soot
Using a vacuum cleaner with a brush attachment, gently vacuum the affected area to remove loose soot and debris. Be careful not to press too hard on delicate surfaces to avoid spreading the soot or causing damage.
Step 5: Wipe with Cleaning Solution
Dampen a soft cloth or sponge in the cleaning solution and wring out any excess liquid. Lightly wipe the soot webs, applying gentle pressure to loosen and remove the residue. Work in small sections and regularly rinse the cloth or sponge to prevent smearing.
Step 6: Rinse and Dry
Once you have removed the soot webs, rinse the cleaned area with a clean cloth or sponge dampened with plain water. Ensure that no cleaning solution residue remains. Thoroughly dry the surface using a dry cloth or allow it to air dry completely.
Step 7: Dispose of Waste Properly
Dispose of any collected soot and cleaning materials in a sealed bag to prevent spreading the particles. Follow your local regulations for waste disposal to ensure compliance.
DIY soot web removal can be an effective solution to restore cleanliness and aesthetics to your home or property. By following the step-by-step guide and implementing safety precautions, you can safely eliminate soot webs. However, if you are unsure about the extent of the issue or encounter stubborn soot webs, it is recommended to seek assistance from a professional restoration expert, such as SERVPRO of Tyler. Remember, regular maintenance and cleaning can help prevent the recurrence of soot webs, ensuring a clean and healthy living environment.
Smoke Detectors for Family Homes: How to Choose the Right One for Your Needs
4/16/2023 (Permalink)
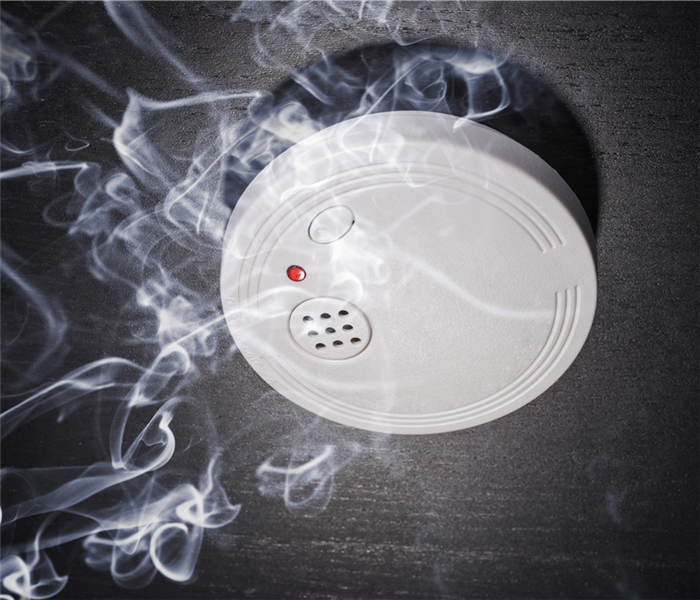 Choosing the right smoke detector for your family home is essential for your safety.
Smoke detectors are an essential safety feature for any family home. They alert you to the presence of smoke, which could indicate a fire, allowing you and your family to quickly evacuate and call for help. But with so many different types of smoke detectors available, it can be challenging to know which one to choose. In this blog post, we will discuss the different types of smoke detectors and help you make an informed decision.
Ionization Smoke Detectors
Ionization smoke detectors are the most common type of smoke detector found in homes. They use a small amount of radioactive material to detect smoke particles. When smoke enters the detector, it disrupts the ion flow, triggering the alarm. Ionization smoke detectors are more sensitive to fast-burning fires and are cheaper than other types of detectors. However, they are less effective at detecting smoldering fires.
Photoelectric Smoke Detectors
Photoelectric smoke detectors use a light source and a sensor to detect smoke. When smoke enters the detector, it scatters the light, triggering the alarm. Photoelectric smoke detectors are more effective at detecting smoldering fires and are less likely to trigger false alarms. They are more expensive than ionization detectors, but many experts recommend using a combination of both types for maximum safety.
Dual-Sensor Smoke Detectors
Dual-sensor smoke detectors use both ionization and photoelectric technology to detect smoke. They offer the best of both worlds, making them the most effective type of smoke detector. However, they are also the most expensive.
Smart Smoke Detectors
Smart smoke detectors connect to your home's Wi-Fi and send alerts to your phone if the alarm goes off. Some smart detectors can even detect carbon monoxide and natural gas leaks. They also provide the added benefit of being able to silence false alarms from your phone. Smart smoke detectors are more expensive than traditional detectors, but they offer added convenience and peace of mind.
Factors to Consider
When choosing a smoke detector, there are several factors to consider. The number of detectors you need will depend on the size and layout of your home. At a minimum, you should have one detector on each level of your home and one in every bedroom. You should also make sure your smoke detectors are interconnected, so if one goes off, they all go off.
You should also consider the power source of your smoke detector. Battery-powered detectors are the most common, but they require regular battery replacement. Hardwired detectors are connected to your home's electrical system, so they don't need batteries, but they require professional installation.
In addition to the type of smoke detector you choose, you should also consider other safety features. Some detectors come with a built-in carbon monoxide detector, which can alert you to the presence of this deadly gas. Others come with a long-life battery that can last for up to 10 years, reducing the need for frequent battery replacement.
In conclusion, choosing the right smoke detector for your family home is essential for your safety. Consider the different types of detectors available and choose the one that best suits your needs and budget. Remember to install detectors on every level of your home, in every bedroom, and ensure they are interconnected. Finally, make sure to test your smoke detectors regularly and replace batteries as needed to ensure they are always functioning correctly.
Can a Fire-Damaged Home Ever Get Back to Normal?
8/24/2022 (Permalink)
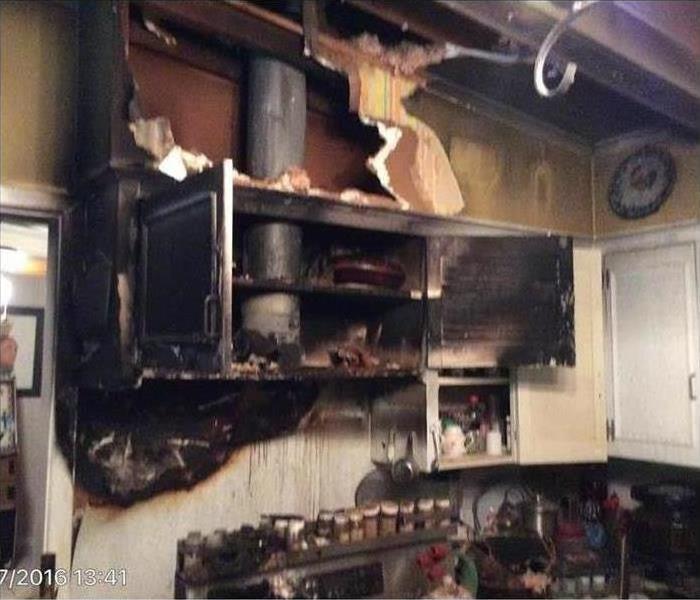 Fire damage in a Tyler, TX home.
Four Steps Fire Restorers Use To Fix Fire Damage
Few things are more heartbreaking than going through a home fire. If your home in Texas has gone through ablaze, whether due to bad electrical wiring or oil fire, it may be a literal shell of its former self. You may wonder if your smoke-damaged home can ever get back to normal. Fortunately, by working with a fire restoration company, you can increase your chances of returning your home to its pre-burn state.
1. Survey the Damage
As you may know, fire restoration firms play no part in extinguishing your home’s blaze. Instead,
firefighters work hard to check your house for inhabitants and stop the destructive fire. After firefighters leave, restorers survey damage. They also board up doors and broken windows to keep criminals from causing additional damage.
2. Clean Personal Belongings
Because your smoke-damaged home is likely not safe or inhabitable, restorers remove salvageable
belongings to clean them off-site. Then, using specialized cleaning products and techniques, restoration technicians remove smoke from your keepsakes.
3. Restore Walls and Floors
Homeowners are often surprised to realize that fire-suppression activities can cause more damage than the fire itself. Restorers work hard to remedy smoke and water damage. Often, they must paint walls and renovate flooring.
4. Tackle Lingering Smoke Odor
Even weeks after a fire, smoke odor can linger in your smoke-damaged home. To encourage a fresh,
clean scent, restorers use ozone and thermal fogging techniques. They also spend time deep cleaning your home’s heating and air conditioning systems. Likewise, with the help of high-powered filters and fans, fire restoration techniques remove small soot particles from your home’s air. After workers finish, homes often smell like they never burned.
Returning your fire-damaged home to normal involves more than simply cleaning soot from walls. When you work with a skilled restoration service, you take advantage of expertise and equipment to recover from your devastating Tyler, TX home fire.
3 Tips for Avoiding Cigarette Fires at Home
5/22/2022 (Permalink)
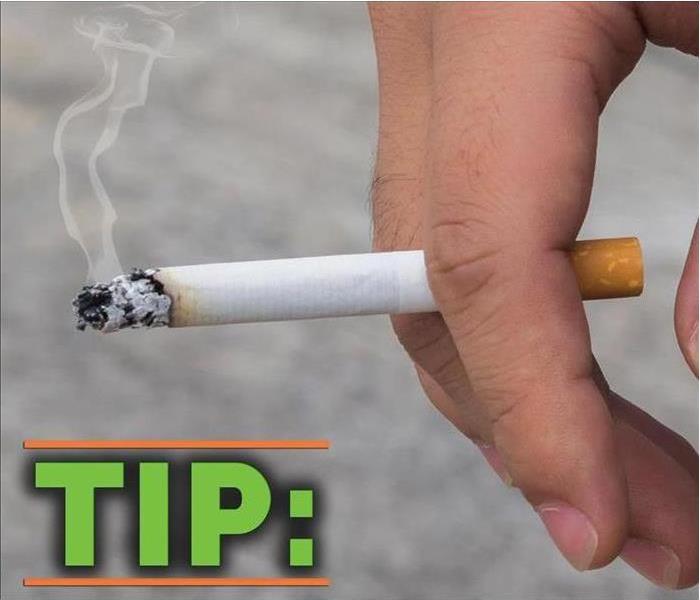 Cigarettes can leave lingering smells.
Cigarettes can leave lingering smells and even create a physical threat: Thousands of residential fires are linked to smoking each year. If it sounds frightening it should! But you have options. Read on to learn how, with just a little extra care, you can avoid your, Bullard, TX home becoming a victim of a cigarette fire.
How Does Smoking Cause Fire?
Smoking may not be the best habit, but you may wonder, how can it cause a fire? There are a variety of ways, obvious and not so obvious. Cigarette butts can ignite:
- Trash
- Dry underbush outdoors
- Improper ash cans
And much more. A cigarette fire can quickly rise from a small event to a full conflagration, so it’s best to take steps to avoid any flames.
Smoke Outdoors
Believe it or not, some folks still smoke indoors, especially at home. Asking members of your family to smoke outdoors removes the risk of an ashtray fire, or of butts or ashes igniting curtains, books, furniture or any other flammable items. It may also leave your house smelling better.
Never Smoke Sleepy
Smoking can be a relaxing pre-sleep ritual for some, but it can come at a high cost. Falling asleep on a couch or in a bed with a lit cigarette can lead to embers igniting fabric. The results can be fatal.
Don’t Use Plants as Ashtrays
It can be tempting, if you’re smoking in the backyard, to toss your butts into the grass. But dry leaves can easily catch fire from a smoldering cigarette butt. Instead, find an ashtray or stamp your butt out.
Smoking remains a common habit and one that can pose a significant fire risk. Learn what not to do. Use the tips above and, should your home be damaged by a cigarette fire, call remediation specialists quickly for fire cleanup you can trust.
Fighting Smoke and Odor Damage After a Commercial Fire
3/22/2022 (Permalink)
 Thermal foggers can send cleaning vapors into tiny cracks and crevices where smoke can hide.
Removing Smoke Odor After a Commercial Fire
After a fire at your commercial building in Bullard, TX, there is often a long list of tasks you must take care of before you can reopen your business and get your company back in operation. If there was no structural damage to your building, removing the water may be foremost on your mind, but once the water is gone, what about the smoke cleaning and terrible odors that penetrated everything during the fire? Contact a professional team of fire remediation and restoration specialists to quickly remove the smoke damage and stains. Here are three of the methods they may use to combat the odoriferous problem.
Air Filtration
With the use of specialized screens, an air filtration system can actually scrub the air and remove lingering odors. The unit works by pulling the dirty, smoke-filled air into the machine with a powerful fan. The air is then passed through a filter that removes the smoke odor and cleans the air. Once the offensive particles are removed, the clean air is returned to the room. To make sure the filters are especially effective, they are often filled with specially treated charcoal.
Ozone Treatment
Ozone treatments do smoke cleaning by using a machine that sends a thick layer of ozone into the room to cover everything the huge oxygen molecules can reach. As the odors and ozone meet, oxidation occurs that chemically alters the problem smoke. This process can also disinfect problematic areas.
Thermal Foggers
Thermal foggers can send cleaning vapors into tiny crack and crevices where smoke can hide. By sending heated deodorizer out into the room as a foggy vapor, the large cleaning particles can chemically attach themselves to the molecules of the smoke and soot that filled the room in hidden or hard to reach areas. The fog can also permeate many solid items that may have absorbed the fire’s smoke.
By using one of the above three methods, a professional team can quickly remove persistent odors after a fire in your commercial building. Once the smoke cleaning is done, you can then get your building open and your company back in business.
3 Ways to Know It’s Time to Replace Your Smoke Alarm
2/15/2022 (Permalink)
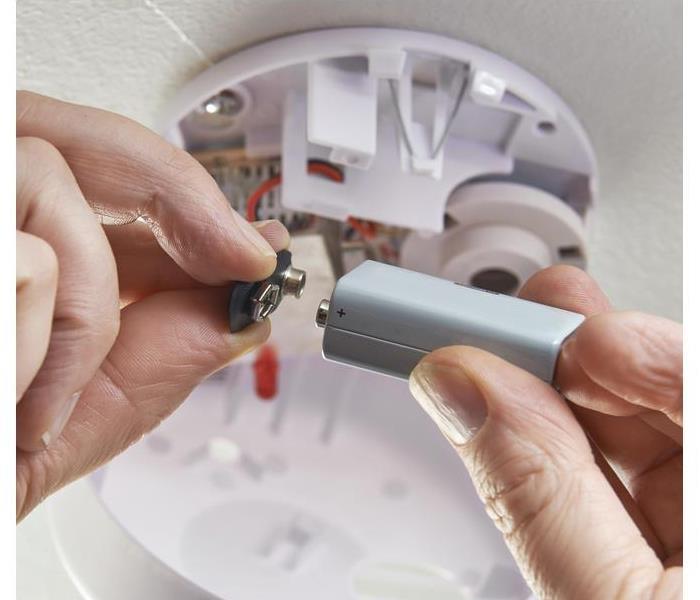 Remember to replace the batteries of your smoke alarm every six months.
A fire or smoke alarm offers one of the simplest and most affordable ways to protect your home from fire damage. But to protect you, they must be in proper working order. Here are a few tips from the experts to help ensure the detector in your Troup, TX, home is in top condition.
The Reason for Smoke Detectors
It’s easy to forget why we have smoke detectors, until you have a fire. These tiny, ubiquitous devices do a big job in keeping us safe. According to safety experts:
- Three out of five home fire deaths occur in buildings where there is no working smoke detector
- Having a working fire detector cuts your risk of dying in a home fire in half
These sobering facts make it clear that you need to have a smoke alarm and make sure it works properly.
Know Your Alarm Type
How often you check your alarm depends a lot on the type you have. For an old-fashioned one powered by a 9-volt battery, be sure to replace the batteries every year. A lithium battery-powered alarm won’t need its batteries touched for a decade, while an alarm that’s hard-wired to your home’s electrical system will likely have a backup battery. As with a standard 9-volt alarm, that battery should be replaced annually.
Heed the Beep
Beeping is one of the top signs that you may need to replace the battery. Press the test button on the alarm to see if it’s still working properly and if not, replace batteries promptly.
Replace Alarms When Needed
Like most things, these devices have an expiration date. Experts recommend replacing all smoke detectors, regardless of the type, every decade for maximum effectiveness.
We’re fortunate to live in an era when the average smoke alarm is affordable. Make the most of your devices by keeping them in working order with these tips from the fire experts.


 24/7 Emergency Service