Archived Water Damage Blog Posts
Emergency Preparedness: Creating a Water Damage Escape Plan
10/23/2023 (Permalink)
Water damage emergencies can occur suddenly and without warning. Whether it's a burst pipe, a severe storm, or a flooded basement, having a water damage escape plan in place is essential to protect yourself, your loved ones, and your property. In this blog post, we will guide you through the steps of creating an effective water damage escape plan to ensure your safety during an emergency.
Assess Potential Risks
Begin by assessing the potential risks in your home that could lead to water damage. Identify areas prone to flooding, such as basements or low-lying areas, and inspect pipes and appliances for potential leaks or weaknesses.
Plan Your Escape Routes
Take the time to plan and identify multiple escape routes from each room in your home. Ensure that windows, doors, and hallways are clear of any obstacles that could hinder your evacuation.
Establish a Meeting Point
Designate a specific meeting point outside your home where all family members or household occupants should gather after evacuating. This will help emergency responders account for everyone's safety and reunite your loved ones quickly.
Ensure Adequate Communication
Make sure you have multiple ways to communicate during an emergency. Keep a charged cell phone and consider having a battery-powered emergency radio as a backup. In addition, establish an out-of-town contact who can act as a central point of communication in case local lines are down.
Prepare an Emergency Kit
As part of your water damage escape plan, assemble an emergency kit that includes essential supplies. Include items such as non-perishable food, water, a first aid kit, flashlights, batteries, a whistle, and any necessary medications. Store this kit in a portable container that can be easily accessed during an evacuation.
Consider Special Needs
If you have family members with special needs, plan accordingly. Ensure that you have any necessary assistive devices or equipment readily available and incorporate their specific needs into your water damage escape plan.
Practice Regularly
Practice makes perfect, so regularly conduct drills to familiarize everyone in your household with the water damage escape plan. Practice using different escape routes and teach family members how to shut off utilities, such as water, gas, and electricity, if necessary.
Reach Out to Professionals
Consider consulting with water damage restoration professionals to assess your home's susceptibility to water damage. They can provide guidance on preventative measures, such as installing sump pumps or sealing vulnerable areas, to mitigate potential risks.
Remember, creating a water damage escape plan is crucial for your safety and the safety of your loved ones. Take the time to create a plan that suits your home's specific needs and regularly review and update it as necessary. By planning ahead and being prepared, you can minimize the potential dangers and protect what matters most.
Essential Tips to Preserve Save Documents, Photos, and Books After Water Damage
7/14/2023 (Permalink)
Experiencing a water leak or flood can be devastating, especially when it comes to preserving your valuable documents, treasured photos, and cherished books. Water damage can quickly ruin these irreplaceable items if not handled properly. In this blog post, we will provide you with essential tips to save and restore your important documents, photos, and books after a water leak or flood. By following these steps, you can increase your chances of salvaging these precious possessions and preserving their sentimental and historical value.
Prioritize Safety and Stop the Water Source
Before attempting to salvage any items, it's crucial to prioritize your safety. Ensure that the affected area is safe to enter and the power supply is turned off to minimize the risk of electrical hazards. Once you've secured the area, stop the water source if it's still flowing. This may involve shutting off the main water valve or fixing the source of the leak.
Act Quickly
Time is of the essence when it comes to minimizing water damage to documents, photos, and books. The longer they remain soaked, the more difficult it becomes to restore them. Begin the restoration process as soon as it is safe to do so.
Handle Items with Care
When handling wet documents, photos, or books, use extreme care to avoid causing further damage. Wear gloves to protect delicate items from fingerprints, and handle them gently to prevent tearing or smudging. If possible, work on a clean, dry surface to prevent additional water absorption.
Separate and Air Dry
Separate the wet documents, photos, and books to prevent them from sticking together. Lay them out individually on a flat surface with good airflow, preferably in a dry and well-ventilated room. Avoid exposing them to direct sunlight, as it can cause further damage. If the items are covered in mud or debris, gently rinse them with clean, clear water before drying.
Utilize Dehumidifiers and Fans
To expedite the drying process, use dehumidifiers and fans in the affected area. These devices help reduce humidity levels and promote airflow, aiding in the evaporation of moisture from the documents, photos, and books. Rotate the items periodically to ensure even drying.
Freeze Wet Photos and Books
If you're unable to start the drying process immediately, or if the items are severely waterlogged, consider freezing them. Freezing halts the deterioration process, giving you more time to properly dry and restore them later. Place the wet photos or books in a plastic bag and seal it before putting them in the freezer. This temporary measure can prevent further damage until you're ready to work on them.
Seek Professional Help
In some cases, professional assistance may be necessary, especially for valuable or severely damaged items. Restoration experts, such as SERVPRO of Tyler, have the knowledge and specialized equipment to handle delicate restoration processes, such as freeze-drying or document restoration techniques. Contact a reputable document restoration company or conservator to assess the extent of the damage and provide guidance on the best course of action.
Prevent Future Water Damage
To prevent future water damage to your important documents, photos, and books, take preventive measures. Store them in waterproof or water-resistant containers or safes. Keep them away from basements, areas prone to flooding, or places where leaks are more likely to occur. Make digital copies of valuable documents and photos and store them securely in the cloud or on external hard drives as an extra layer of protection.
Water leaks and floods can pose a significant threat to your important documents, photos, and books. By acting quickly and following these essential tips, you can increase your chances of salvaging and restoring these precious possessions. Remember to prioritize safety, handle items with care, separate and air dry them, utilize dehumidifiers and fans, and consider professional assistance when needed. Taking preventive measures can also help safeguard your valuable items from future water damage. By implementing these steps, you can preserve the sentimental and historical value of your important documents, photos, and books for years to come.
Is Water Damage Covered Under My Homeowners Insurance Policy?
3/16/2023 (Permalink)
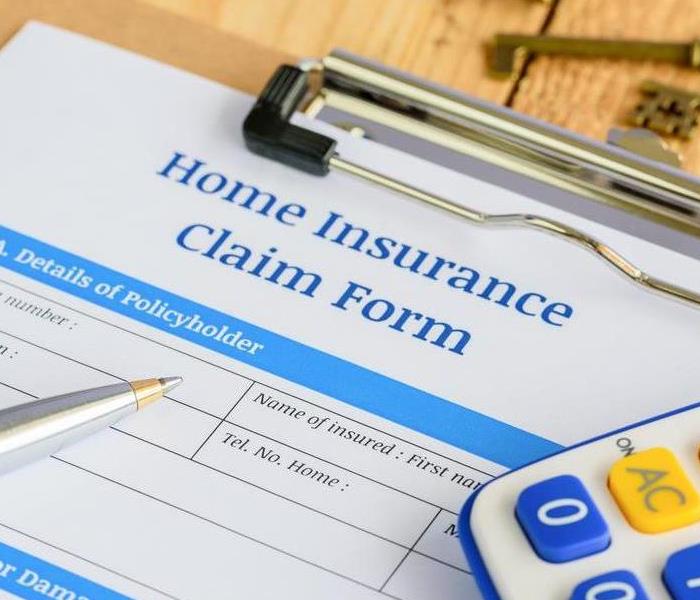 Water damage is common, make sure to have the right homeowner insurance.
Water damage can be a stressful and expensive experience. If your home was damaged by water, you may be wondering if your homeowner's insurance policy covers the cost of repairing the damage. Here, we'll take a look at how water damage is covered by home insurance policies and how to protect yourself from this risk in the future.
Is Water Damage Covered by Homeowners Insurance?
Most homeowners insurance policies will cover water damage to your home, but not all of them do. And even if your policy does cover it, that doesn't mean you're off the hook for paying out-of-pocket expenses.
The first thing to know is that there are two types of water damage: external and internal. External means rain or snow coming through the roof; internal means a burst pipe or leaky faucet somewhere inside your house.
The answer to this question depends on three main factors: your policy type, where the water damage originated from, and whether it was accidental or wear-and-tear.
What is your Policy Type?
If your policy is a standard one, then you may be covered. A standard homeowner's insurance policy is designed to cover losses from water damage, fire, theft, and other perils that are common to most homes. If you have a named peril policy or an umbrella policy, there are certain exclusions that apply which could mean that water damage is/isn't covered under these types of policies either. At the end of the day, coverage depends on your policy type. Understanding your policy and its coverage is important in order to be prepared for unexpected losses.
Where did the Water Damage Originate from?
If you're wondering whether your homeowner's insurance policy covers water damage, the next question to ask yourself is: where did the water damage originate from? In other words, was it caused by a storm or natural disaster or by a burst or leaking pipe?
If you are dealing with water damage from a burst pipe or a leaking appliance, then this is likely covered by your homeowner's insurance. However, if the source of the water loss is a flood--then there's no guarantee that your insurer will cover any repairs needed as a result of this type of incident.
Was it Accidental or Wear-and-Tear?
The difference between accidental and wear-and-tear water damage is in the cause. Accidental damage happens when a sudden, unexpected event like a burst pipe or an appliance leak causes water damage. Wear-and-tear water damage occurs because of gradual deterioration to your property's structure or foundation over time, such as cracks in the walls or foundation, or leaks that go untouched for extended periods of time.
Water damage is a common problem and one that can be very expensive to fix. If you have water damage, your home insurance will most likely cover it, but there are exceptions. You should always check with your agent when buying homeowners insurance.
What are the 3 Categories of Water Damage?
2/13/2023 (Permalink)
 Many people don't know all three categories of water damage that are commonly found in homes and businesses after an unexpected flood or leak happens.
When someone experiences water damage, it can be a significant inconvenience. The clean-up process is often expensive and time-consuming, which can make water damage feel overwhelming. To make matters worse, many people don't know all three categories of water damage that are commonly found in homes and businesses after an unexpected flood or leak happens. However, understanding these categories will help you grasp what you need to do to eliminate the problem before it becomes more serious than it has to be.
There are 3 Categories of Water Damage
There are three categories of water damage:
- Category 1 – This is the least severe type of water damage, known as "clean water."
- Category 2 – The second category is more severe because it involves contaminated water, also known as "grey water."
- Category 3 – This third category is the most severe type of water damage, also known as "black water."
Category 1
Category 1 is the least severe category of water damage. It is also known as "clean water" and can be caused by leaking pipes or supply lines, overflowing bathtubs, sinks, or toilet bowls, and even melting ice, snow, or rainwater.
Category 1 water damage is not necessarily dangerous to your home or belongings, but it should be addressed as soon as possible. If left untreated for too long, Category 1 water damage can cause significant damage to your property and can lead to a mold infestation.
Category 2
Category 2 water damage is also known as "grey water" and comes from water mixed with chemicals or other contamination. It can be the result of broken appliances such as a dishwasher or washing machine, sump pump failures, overflows from toilet bowls, and even condensate water.
Category 2 water can be harmful to humans and pets if they come into contact with it. Because of this, it requires professional decontamination during the mitigation process to ensure that your property is clean and sanitary.
Category 3
Category 3 water damage requires immediate professional attention. This category of water damage is the most severe and can be caused by sewage, floods, or other heavily contaminated water sources. It is also known as "black water."
As contaminated as this kind of water is, you should not even consider attempting to clean it yourself. To keep yourself and others on your property safe, contact a team of experts right away if your home has been affected by category 3 water damage.
Water damage can be devastating. It is important to know what category of water damage you are dealing with after a loss to ensure that your property is getting the proper care. Restoration professionals, such as SERVPRO of Tyler, Lindale, Palestine, are highly trained in all 3 categories of water damage and will take care of your property from start to finish. If you’re dealing with water damage in the Tyler, TX, area and would like more information, don't hesitate and contact our SERVPRO of Tyler, Lindale, Palestine team today!
How To Use a Plumbing Snake
11/12/2022 (Permalink)
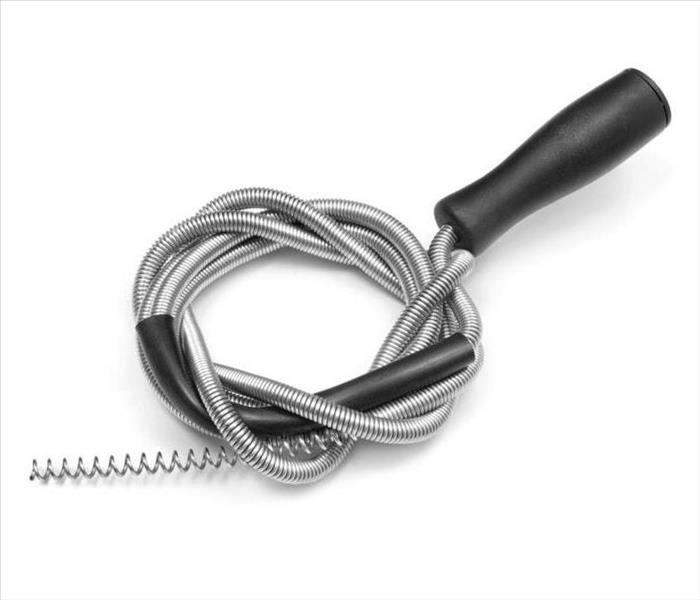 The process of using a plumbing snake is not complicated, but it does require some practice.
Using a Plumbing Snake
If you're having problems with your plumbing, the first thing to try is to use a plumbing snake. A plumbing snake is a long cable that has a handle on one end and an attachment for inserting into drain lines at the other end. It's an inexpensive tool that can save you from having to call in expensive professional plumbers or even tearing apart your walls in order to fix them. Just follow these steps:
Step 1: Choose Your Plumbing Snake
To begin, you will need a plumbing snake. You should choose the appropriate size for your pipes so that it can easily slide through them. The first thing you'll want to do is make sure the snake is in prime condition. The last thing you want is your new tool breaking down on its first day in action! To do so, take out any hair or debris clogging the tip of the pipe cleaner and carefully wipe down any dirt that may have gotten inside your tool (or caused an air bubble). You don't want this stuff flying into any other parts of your house!
If there is no water in your pipe, use a plunger first to clear any clogs or debris that may be blocking it. A bucket should be placed under the area where you are working to catch any water that comes out during this process. If using a wet/dry vacuum is not possible, consider using an alternative method by turning off your main water supply before removing clogs from toilets or sinks. This prevents damage if something goes wrong with your plumbing system during this process!
Step 2: Insert the snake into the pipe until you feel resistance.
Place one end of the snake over where there might be an obstruction blocking water flow in your system. Most likely this will be near where water enters or leaves from underground pipes; these areas tend not only to be more prone to clogs but also easier places through which mice can crawl if they've made their way into our systems as well (even though we'd rather them stay away). Make sure that both ends are pointed upwards towards where debris could be lodged within pipes; then gently push forward until resistance is felt on one side.
Step 3: Turn the snake clockwise.
Once you’ve inserted the snake, slowly turn the crank clockwise. You should immediately feel resistance as it encounters a clog in your drain. If you can’t feel any resistance at all, stop using the snake and call a professional plumber to remove whatever is blocking your pipe.
If you do feel some resistance from a clog but can't get it out with one try, keep going—it will come through eventually!
If nothing happens when turning this wrench and pulling on the cable with force doesn't help either, then it's likely stuck inside of whatever's causing the blockage in your drain pipe and may need to be removed manually by someone qualified for such work who has experience dealing with such plumbing issues.
Step 4: Extract the Snake
Once the cable has been pushed through and its entire length is in the drain obstruction, you'll need to let go of your plumber's snake. If there is too much tension on the line, start cranking counterclockwise to extract your plumbing snake from your pipe. This will pull any debris out with it and allow for easier removal in later steps.
The process of using a plumbing snake is not complicated, but it does require some practice. You will need to learn how much tension you can apply before it becomes too much for your line and the proper way to extract whatever was clogging up your drain. Once you have mastered this skill, however, it will be an invaluable tool when dealing with clogged drains or any other issue related to pipes in your home or office building.
If you find yourself in a water damage event because of the clogged drain, give SERVPRO of Tyler a call! We will get your Tyler, TX home back to normal as quickly as possible.
6 Steps to Preserve Wood Floors from Water Damage
7/26/2022 (Permalink)
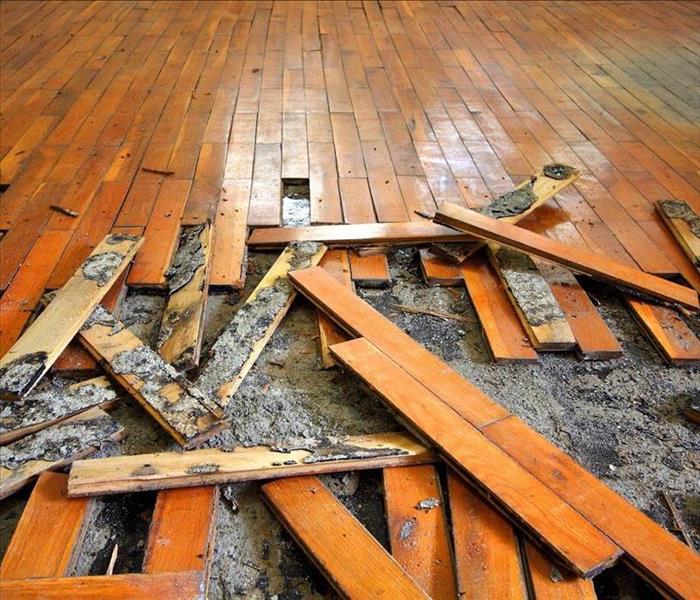 Wood floor damaged by water.
Steps To Help Prevent Long-Term Damage
Wood flooring can bring a pleasing aesthetic to your Troup, TX, business. While durable and long-lasting, it does have a weak point: water. If your business experiences a pipe burst, the wood floor will rapidly begin to absorb the water. If left unchecked, it can quickly lead to staining, cupping, buckling, and cracking, which could mean costly repairs. Below are steps to help prevent long-term damage.
1. Removed Saturated Items
The moment you notice a wet floor, quick action is necessary. Immediately remove any rugs or furniture. Leaving them in place will result in more moisture being absorbed in the floor, as well as increase the chances of mold or mildew growth.
2. Soak Up the Water
Use whatever you have on hand to soak up as much water as possible. The longer standing water remains, the more chances your floor will be damaged. It is important to consider the type of water. If there is any potential for contaminants, extra safety precautions should be taken.
3. Clean the Floor
Any debris or dirt left in the pores of wood flooring can store bacteria. Disinfecting the entire surface can help eradicate that potential problem.
4. Dry It Out
After a pipe bursts, open windows and fans can become your best friend. Increased airflow is essential for wood to dry out.
5. Perform a Moisture Test
Testing meters are available that display moisture levels. Depending on the extent of the damage and humidity levels, it could take weeks for the floor to completely dry.
6. Get Professional Help
Anytime your business faces excess water, it is worth contacting a water and mold damage expert. Along with ensuring your wood floors are properly cleaned and dried, they will be able to locate any hidden water damage that may have made its way into the walls or under the floor.
While a pipe burst is a massive hassle, taking quick action is imperative to avoid long-term damage.
How To Save Wet Documents After a Flood
6/21/2022 (Permalink)
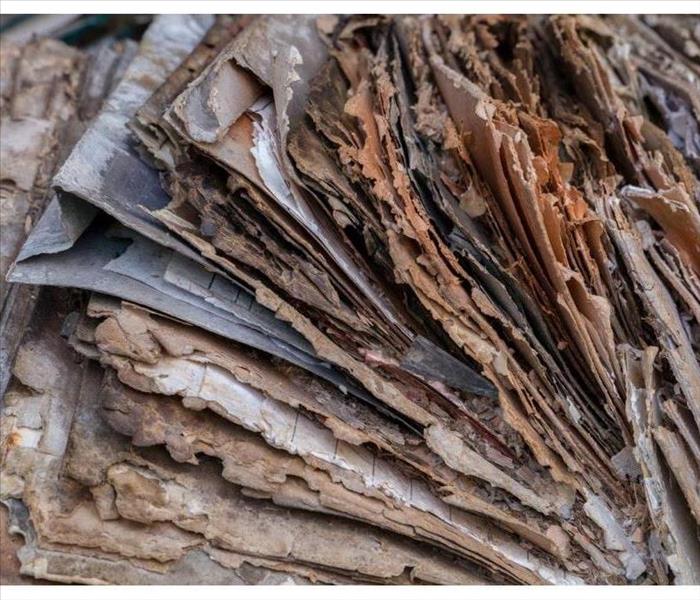 Salvaging wet documents is possible when following a thorough process.
How To Salvage Wet Documents
When your business suffers from water damage, the building must undergo a cleaning and restoration project, as well as any valuable items that appear ruined. Salvaging wet documents is possible when following a thorough process. Here is what you need to know if you need to save flooded documents within your Arp, TX, commercial space.
1. Get Wet Documents to a Freezer
The first key step to saving your paper items is getting them in a freezer as quickly as possible. Taking swift action here prevents the document from deteriorating as well as producing mold or bacteria if it remained wet. After you've got your items in a freezer, contact a local water damage restoration expert who will then transport the documents to a state-of-the-art facility that specializes in document drying. Their specially designed vacuum-freezer will suck any remaining moisture out of the paper for advanced restoration.
2. Gamma Irradiation Cleaning
If your documents came in contact with wastewater or outdoor flooding, they will be inundated with harmful bacteria, pesticides and other dangerous properties. Experts will employ what's known as gamma irradiation to kill off any biohazards and sterilize the paper once it has been freeze-dried. This step is critical for eliminating any health risks associated with water damage.
3. Produce Digital Copies of Documents
Once your items have undergone drying and sterilization, restoration professionals will then produce digital copies. This offers peace of mind to business owners who can now easily access their documents digitally and don't have to worry about their hard copies becoming damaged in the event of another flood disaster.
If your commercial space experiences a water issue that has compromised valuable papers, it's paramount to immediately place the wet documents in a freezer. From there, let professionals step in with specialized vacuum-freeze drying, gamma irradiation cleaning and digitizing of the documents.
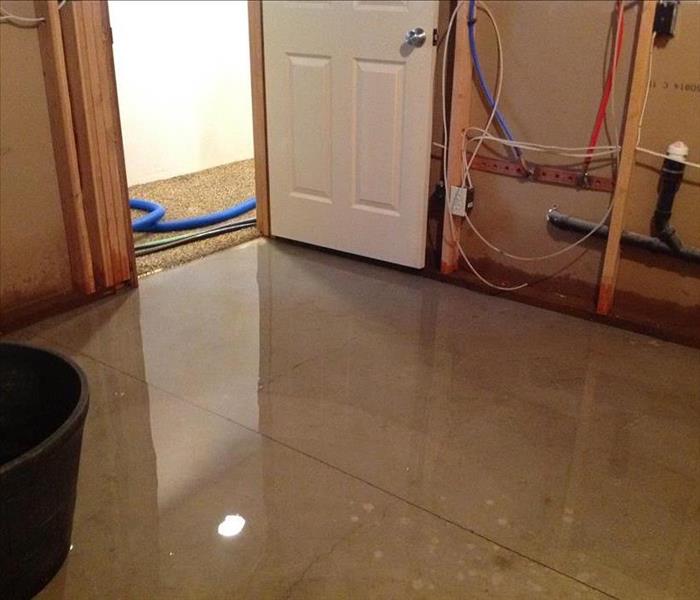
What NOT To Do After Water Damage Occurs
4/22/2022 (Permalink)
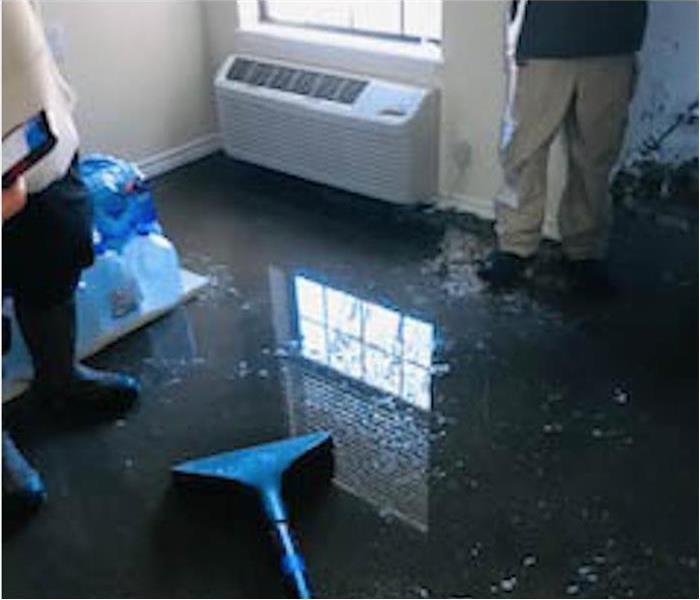 Powerful removal equipment allows us to remove standing water quickly.
Secondary Damage Concerns Should Be Considered by Business Owners
If your home has experienced flooding in Tyler, TX, it's important to act right away. You know that you need to call your insurance company and that they will recommend a water damage restoration service that can help with your home repairs. Did you know there are some things NOT to do for the safety of you and your family?
1. Do NOT Use a Vacuum
You know it's important to remove standing water quickly in order to prevent damage. However, a regular vacuum cleaner is NOT the right appliance for the job. A shop vacuum that is intended for water may be used, but a vacuum that is meant for picking up dirt, even if it's a steam cleaner, is not safe to use to remove standing water in your home.
2. Do NOT Operate Appliances
A broken pipe that has led to flooding can compromise the electrical system in your home. Do NOT use the television, washer and dryer, or plugin other small appliances like heaters or hair dryers until a professional has determined that it is safe to do so.
3. Do NOT Leave Things on the Floor
Once you can safely enter the space that is flooded, do NOT leave items on the floor. Books and magazines can bleed color onto carpets and flooring. Rugs retain moisture and should be removed quickly. If possible, remove, or at least elevate, furniture to allow air to flow freely beneath the pieces.
4. Do NOT Take Risks
Cleanup from a broken pipe is important to prevent long-term damage, but doing so is not worth risking your health and safety. Do NOT enter rooms where the ceiling is sagging or where standing water is touching electrical appliances. Do not turn on lights, especially if water is leaking from the ceiling.
Flooding in your home is overwhelming, whether caused by a broken pipe or a natural disaster. Call for help and always take reasonable precautions to protect yourself from harm.
What Happens During Water Heater Cleanup
1/30/2022 (Permalink)
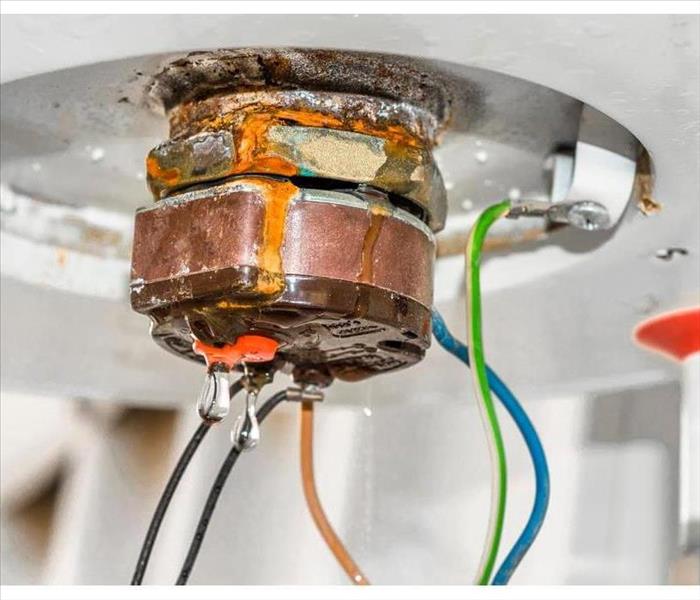 When it comes to a leaking water heater, it’s important that you never ignore it.
Water Heater Cleanup
Most water heaters are stored in a convenient space out of everyone’s way, either in a basement, closet or garage. While this is great when it comes to floorplan layout, it can be inconvenient if you have a leaking water heater. The time it takes to clean up after a broken water heater depends heavily on where it’s located. Here’s a look at what happens during a water heater cleanup.
1. Complication Assessment
The first thing that your water cleanup specialist is going to do is figure out how difficult of a remediation job it’s going to be. If a failed water heater has flooded part of your home, professionals will be able to figure out the easiest and best way to clear the water and restore the damage.
2. Water Extraction
The water has to be taken out quickly. Mold growth is more rampant in warm and wet areas. The warm water is perfect for the growth of bacteria. When it comes time to remove the water, you can’t simply soak it up or use a sump pump to extract it. There may be more moisture than you can see. A professional has to draw water from the walls and the carpets. This can be done with pumps, vacuums, and dehumidifiers.
3. Home Disinfection
If your leaking water heater is out of sight and out of mind, it’s possible that you won’t realize that it flooded your basement or garage. In this case, there could be time for mold to grow. Cleanup and disinfecting have to come next. Scrub walls and non-porous surfaces with a strong formula of detergent, water, and vinegar.
When it comes to a leaking water heater, it’s important that you never ignore it. While any type of flood in your Troup, TX, home can seem overwhelming, the water mitigation process is uncomplicated with the help of a remediation professional.


 24/7 Emergency Service